In Part 2 of this SSH series, we talked about what it means to send “insecure” messages through an “insecure” communication system and why that is a problem. In Part 3, we will look at how the SSH protocol addresses that problem.
To recap, we said previously that SSH is a set of rules (a protocol) that defines how to communicate “securely” over an insecure line of communication. What does this look like?
Sending Secure Messages Through the Postal System
Let’s go back to our example where we use the postal system as an insecure communication system. Let’s say this time you decide to make your message more secure. You still have to put your message on a post card, where the message text will be exposed. Furthermore, you will need to send it through the postal system, where it will be handled by multiple people.
With that in mind, this time you decide to scramble up the message in a special way that only you and your friend know how to unscramble. Then you write the message down and mail it off.
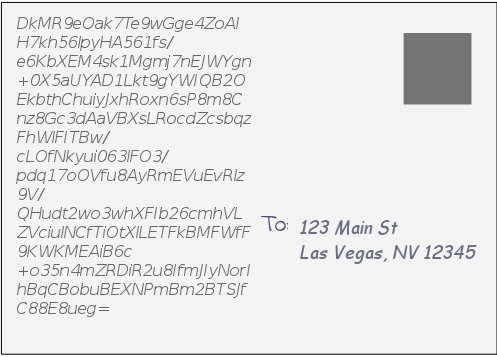
As your post card goes from Florida to Nevada, it makes a stop in Kansas again. Our same postal worker friend retrieves the large box that contains your post card from one truck in order to load it onto another truck. Just like last time, your card happens to be at the top of the heap of letters.

This time, when the postal worker casually glances at your card, he cannot make sense of the message. That is because this time, your message is not in plaintext. By scrambling up the message, you have encrypted it.
Despite the fact that the postal worker cannot understand the message, he can still see where you card needs to go. So your post card continues along its merry way through all of the intermediary stops from Florida to Nevada.
If anyone attempts to read your card before it gets to its intended recipient, the message will not make any sense. The content of your message is now secure. When your friend receives the post card, she will know how to unscramble the message.
You have officially found a way to send a “secured” message through an insecure communication system.
Sending Secure Messages Between Computers
Let’s see what this looks like when we want to send secure messages between computer systems over the Internet. If we adopt the SSH set of rules when sending our messages, we will see something similar to the postal system scenario described above.
SSH File Transfer Protocol
In order to send messages using the SSH protocol, we will need to use software tools that stick to the rules of the protocol. We will use SFTP (SSH File Transfer Protocol) to send data between two computer systems while adhering to the rules of the SSH protocol.
Software tools that implement SFTP are often part of the suite of SSH-related software that comes out of the box on Linux distributions. In this example, we are using Ubuntu 18.04.4 LTS on one system and Ubuntu 16.04.6 LTS on the other. Both computer systems have sftp client and server programs installed.
Establishing An SSH Connection
Last time, we transferred an html file from the example.com remote server to our local server using the HTTP protocol. Our objective this time is to send an html file from a remote server to our local server using the SSH protocol.
We cannot use the example.com server this time because we do not have the ability to establish an SSH connection with it. We need to establish an SSH connection between our two servers in order to use SFTP, so we will use a Linode server as the remote server.
This series on SSH has mainly focused on the data protection feature of SSH, but SSH addresses other security concerns as well. For example, it provides a mechanism for two computer systems to verify each other’s identities before allowing any communication.
We need to do that here because our local system does not know about the Linode system. If you are working with a remote system your local system knows about, you can skip the section “Adding to the List of Known Hosts.”
Adding to the List of Known Hosts
Let’s run the ssh client application to connect to the remote system with the following command:
ssh <user>@<remote server IP address>
We get a message stating that the authenticity of the remote server has not been established. In other words, the local server has no record of this remote server.
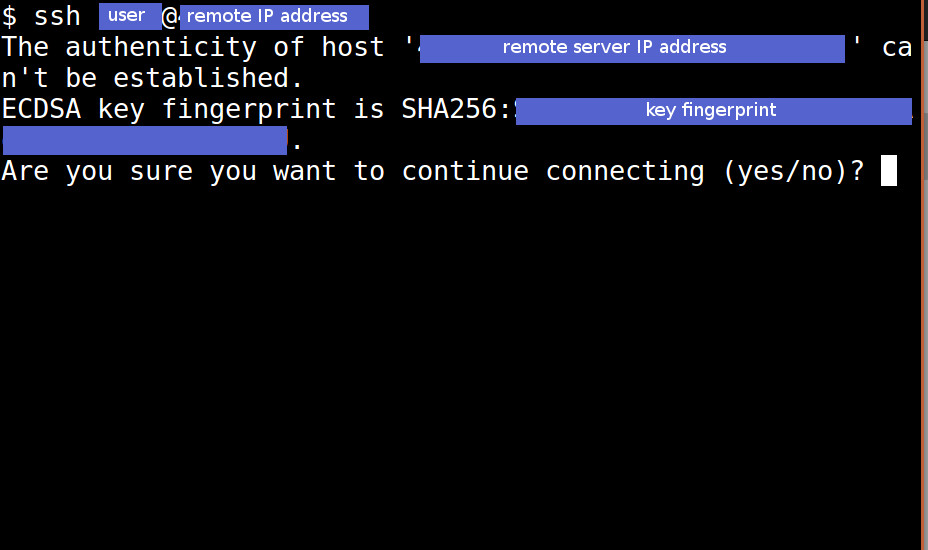
This is our chance to verify that we know this particular server and do indeed intend to connect with it. If we enter yes, our local system will make a note that this particular server is “known.”
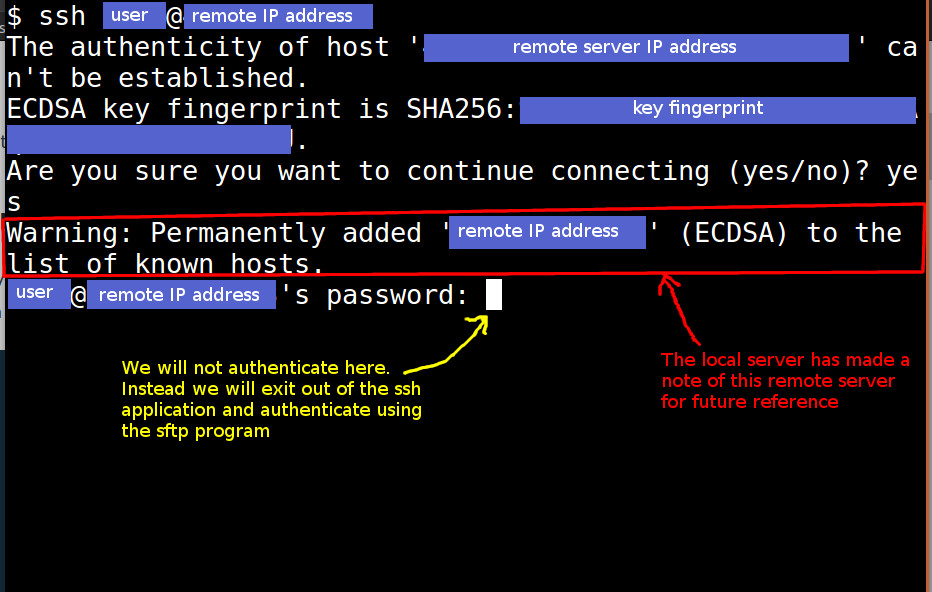
Once a server is “known,” we will not need to go through this verification process again. Exit out of the ssh application by pressing Ctrl + C.
Running the sftp Client
From here, we will start up the sftp client application on the local system. Type in the following command: sftp <user>@<remote server IP address> We will need to authenticate with the remote server.
In our case, the method of authentication is username and password.
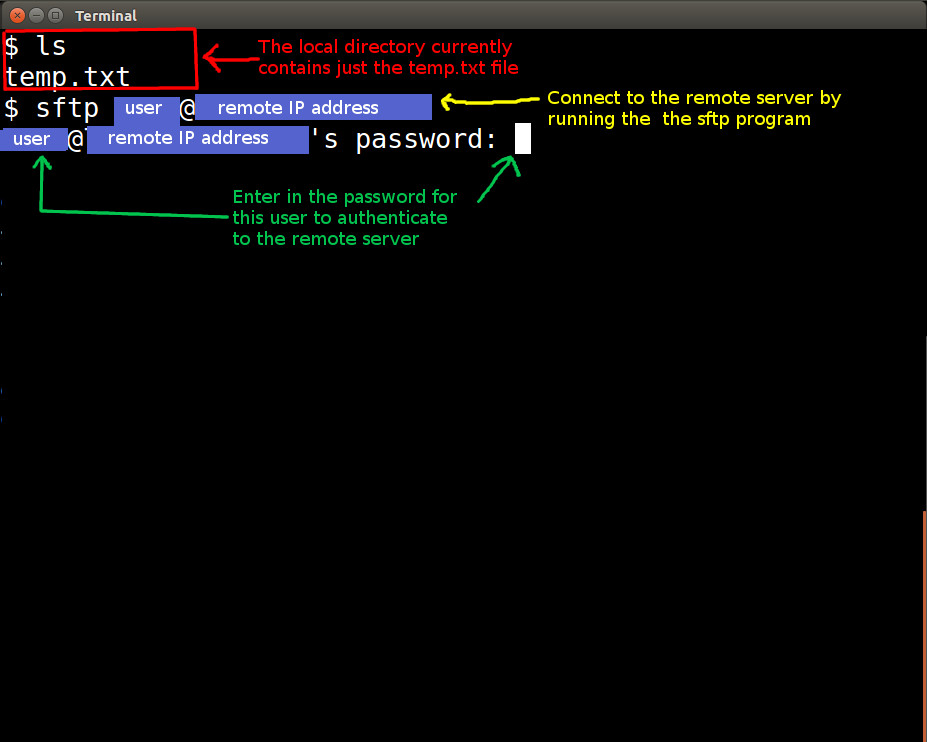
SSH allows for other ways to authenticate on remote systems. All of that has to be configured before you attempt to establish an SSH connection between systems.
Sending the File
Now that we have authenticated on the remote server, our sftp session is active.
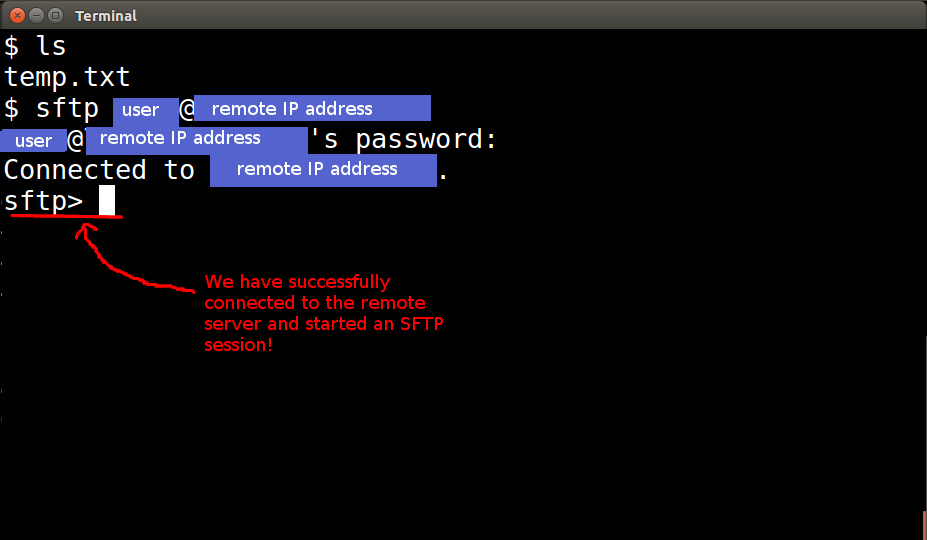
We are ready to transfer files now. When we sent our html message last time, we used an application called wireshark to look at the message as it passed across the local machine’s network card. Let’s do that again.
If you do not have wireshark on your system, go to the “Setup” section of Part 2 to see what we did before.
Let’s go ahead and fire up the wireshark application and click on the blue shark fin icon to begin monitoring network traffic on our system.
There is a file named example.html already on our remote Linode sever because we added it beforehand. You can, of course, use whichever remote file you have available. We want to copy that file to the local server, naming it remote_example.html locally. We can do that by running this sftp command: get example.html remote_example.html
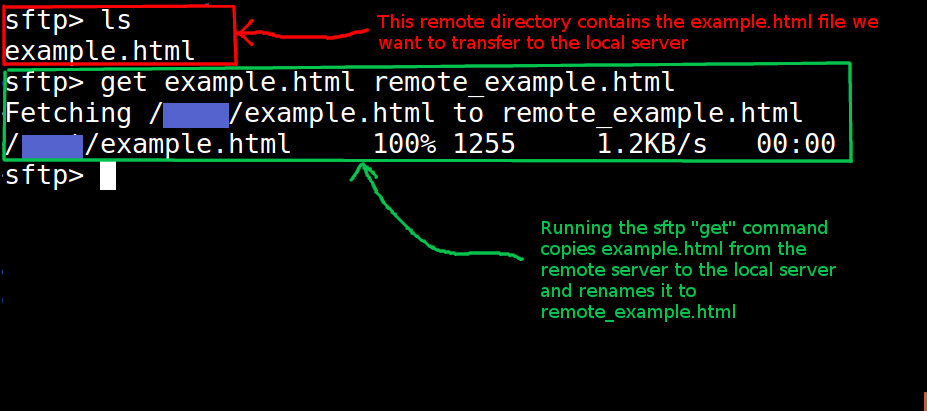
We will stop monitoring network traffic in wireshark by clicking on the large red square directly to the right of the blue shark fin.
Now, we can exit out of the sftp session by typing exit

Reading SSH Messages In Transit
Now that we have sent messages from the remote server to the local server using SFTP, let’s see what those messages looked like.

We generated the conversation between the local server and the Linode server by right clicking on the SSH packet line item pictured above, scrolling down to Follow, and then clicking on TCP Stream.
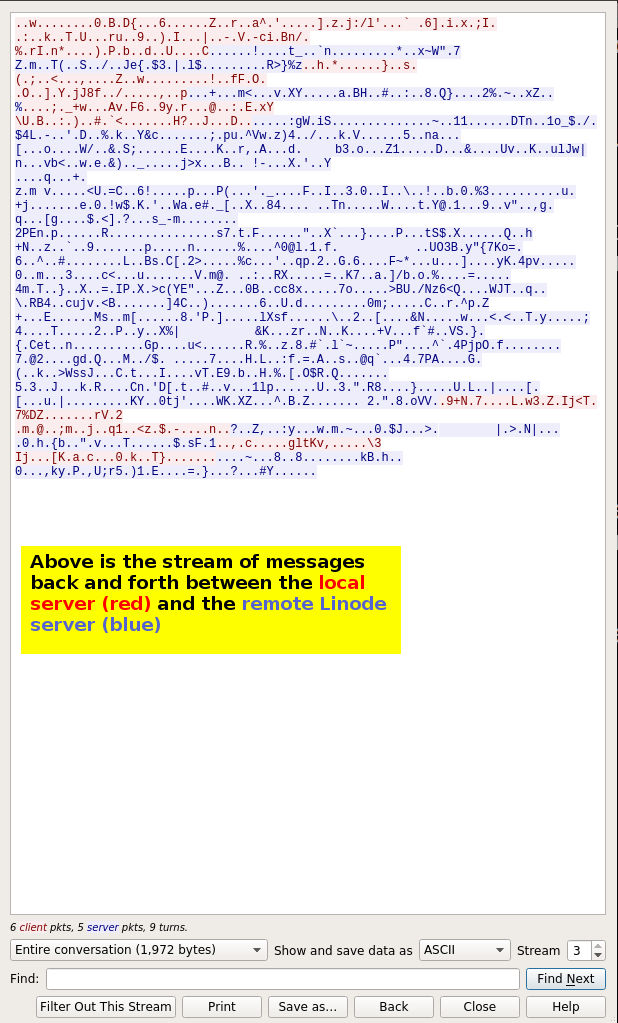
Notice that although you can see the message, in the words of our postal worker friend, “It doesn’t make any sense!” We have protected the contents of our message from unintended parties.
When our message gets to its intended recipient (the local server in this case), that computer will use its versions of the sftp and ssh programs to unscramble the message.
We have officially sent a message securely over an insecure system of communication (the Internet).
Conclusion
We just took a deeper look at what is meant when we say SSH provides a way to have “secured” messages sent over an “insecure” line of communication.
In the next and final part, we will wrap up our talk about SSH by looking at software implementations of the SSH protocol.
Articles in the What Exactly is SSH?? (The Secure Shell) Series